下記のシリーズの続きです。
- WSL 上に Lambda のローカル実行環境を作る:実行環境を作る (1/3)
- WSL 上に Lambda のローカル実行環境を作る:ローカルでデバッグ (2/3) <- いまここ
- WSL 上に Lambda のローカル実行環境を作る:aws にデプロイ (3/3)
実行環境ができたので、早速サンプルを試してみます。
サーバーレスのローカル開発環境を整備する ~中編 - 変化を求めるデベロッパーを応援するウェブマガジン | AWS
TODO たぶんなくす チュートリアル: で Hello World アプリケーションをデプロイする AWS SAM - AWS Serverless Application Model
プロジェクトを作成
まずは、参考記事にあるサンプルを作ってみます。記事は Java の例ですが、ここでは Python を選んでみます。
SAM CLI を使って、プロジェクトの作成を呼び出します。
mor@DESKTOP-DE7IL4F:~/tmp/sam_samples$ sam init

You can preselect a particular runtime or package type when using the `sam init` experience.
Call `sam init --help` to learn more.

Which template source would you like to use?
        1 - AWS Quick Start Templates
        2 - Custom Template Location
Choice: 1
テンプレートを利用することにして、
Choose an AWS Quick Start application template
        1 - Hello World Example
        2 - Data processing
        3 - Hello World Example with Powertools for AWS Lambda
        4 - Multi-step workflow
        5 - Scheduled task
        6 - Standalone function
        7 - Serverless API
        8 - Infrastructure event management
        9 - Lambda Response Streaming
        10 - Serverless Connector Hello World Example
        11 - Multi-step workflow with Connectors
        12 - GraphQLApi Hello World Example
        13 - Full Stack
        14 - Lambda EFS example
        15 - DynamoDB Example
        16 - Machine Learning
Template: 1
まずは、 Hello World のサンプルを選びます。この Hello World のサンプルは API Gateway + Lambda で構成されていて、 http リクエストを受けて、応答を返すというサンプルになります。
Use the most popular runtime and package type? (python3.13 and zip) [y/N]: y

Would you like to enable X-Ray tracing on the function(s) in your application?  [y/N]:

Would you like to enable monitoring using CloudWatch Application Insights?
For more info, please view https://docs.aws.amazon.com/AmazonCloudWatch/latest/monitoring/cloudwatch-application-insights.html [y/N]:

Would you like to set Structured Logging in JSON format on your Lambda functions?  [y/N]:

Project name [sam-app]: sam-hello-world
ランタイムとして、 Python が推奨されているので、そのまま選びます。あとはプロジェクト名以外はデフォルト値とします。
    -----------------------
    Generating application:
    -----------------------
    Name: sam-hello-world
    Runtime: python3.13
    Architectures: x86_64
    Dependency Manager: pip
    Application Template: hello-world
    Output Directory: .
    Configuration file: sam-hello-world/samconfig.toml

    Next steps can be found in the README file at sam-hello-world/README.md


Commands you can use next
=========================
[*] Create pipeline: cd sam-hello-world && sam pipeline init --bootstrap
[*] Validate SAM template: cd sam-hello-world && sam validate
[*] Test Function in the Cloud: cd sam-hello-world && sam sync --stack-name {stack-name} --watch

mor@DESKTOP-DE7IL4F:~/tmp/sam_samples$
作成が完了すると、こんな感じの表示になります。テンプレートから作られたファイルを確認するとこんな感じでした。
mor@DESKTOP-DE7IL4F:~/tmp/sam_samples/sam-hello-world$ tree
.
├── README.md
├── __init__.py
├── events
│   └── event.json
├── hello_world
│   ├── __init__.py
│   ├── app.py
│   └── requirements.txt
├── samconfig.toml
├── template.yaml
└── tests
    ├── __init__.py
    ├── integration
    │   ├── __init__.py
    │   └── test_api_gateway.py
    ├── requirements.txt
    └── unit
        ├── __init__.py
        └── test_handler.py

6 directories, 14 files
mor@DESKTOP-DE7IL4F:~/tmp/sam_samples/sam-hello-world$
ちなみに、初めて、 sam init でアプリケーションを作ったときは、 *.py とかテスト用の test フォルダが作られていませんでした。何度か試すうちにいつのまにやら作られるようになってました。謎だ。
ビルド
ここで、サンプルアプリケーションができたので、一度ビルドできるか試してみます。
mor@DESKTOP-DE7IL4F:~/tmp/sam_samples$ cd sam-hello-world/
mor@DESKTOP-DE7IL4F:~/tmp/sam_samples/sam-hello-world$ sam build
Starting Build use cache
Manifest file is changed (new hash: 3298f13049d19cffaa37ca931dd4d421) or dependency folder (.aws-sam/deps/137a595b-8df5-4f3b-bc3f-6a253fdf30f5) is missing for (HelloWorldFunction), downloading
dependencies and copying/building source
Building codeuri: /home/mor/tmp/sam_samples/sam-hello-world/hello_world runtime: python3.13 architecture: x86_64 functions: HelloWorldFunction

Build Failed
Error: PythonPipBuilder:Validation - Binary validation failed for python, searched for python in following locations  : ['/home/mor/.pyenv/shims/python', '/home/mor/.pyenv/shims/python3', '/usr/bin/python3', '/bin/python3'] which did not satisfy constraints for runtime: python3.13. Do you have python for runtime: python3.13 on your PATH?
mor@DESKTOP-DE7IL4F:~/tmp/sam_samples/sam-hello-world$
おっと、 python 3.13 が入ってないと怒られました。
このサンプルディレクトリの python を 3.13 に切り替えます。
mor@DESKTOP-DE7IL4F:~/tmp/sam_samples/sam-hello-world$ pyenv local 3.13.1
mor@DESKTOP-DE7IL4F:~/tmp/sam_samples/sam-hello-world$ python3 --version
Python 3.13.1
mor@DESKTOP-DE7IL4F:~/tmp/sam_samples/sam-hello-world$
やり直します。
mor@DESKTOP-DE7IL4F:~/tmp/sam_samples/sam-hello-world$ sam build
Starting Build use cache
Manifest file is changed (new hash: 3298f13049d19cffaa37ca931dd4d421) or dependency folder (.aws-sam/deps/137a595b-8df5-4f3b-bc3f-6a253fdf30f5) is missing for (HelloWorldFunction), downloading
dependencies and copying/building source
Building codeuri: /home/mor/tmp/sam_samples/sam-hello-world/hello_world runtime: python3.13 architecture: x86_64 functions: HelloWorldFunction
 Running PythonPipBuilder:CleanUp
 Running PythonPipBuilder:ResolveDependencies
 Running PythonPipBuilder:CopySource
 Running PythonPipBuilder:CopySource

Build Succeeded

Built Artifacts  : .aws-sam/build
Built Template   : .aws-sam/build/template.yaml

Commands you can use next
=========================
[*] Validate SAM template: sam validate
[*] Invoke Function: sam local invoke
[*] Test Function in the Cloud: sam sync --stack-name {{stack-name}} --watch
[*] Deploy: sam deploy --guided
mor@DESKTOP-DE7IL4F:~/tmp/sam_samples/sam-hello-world$
無事にビルドできましたね。
なお、上記とは本質的に関係ありませんが、ついでに venv も設定しておきます。
mor@DESKTOP-DE7IL4F:~/tmp/sam_samples/sam-hello-world$ python3 -m venv .venv
mor@DESKTOP-DE7IL4F:~/tmp/sam_samples/sam-hello-world$ . .venv/bin/activate
(.venv) mor@DESKTOP-DE7IL4F:~/tmp/sam_samples/sam-hello-world$
VSCode で開く
では、次は VSCode で開いて、デバッグを試します。
VSCode を立ち上げます。WSLに接続していない時は、接続します。次に、作成したアプリケーションフォルダを選択します。
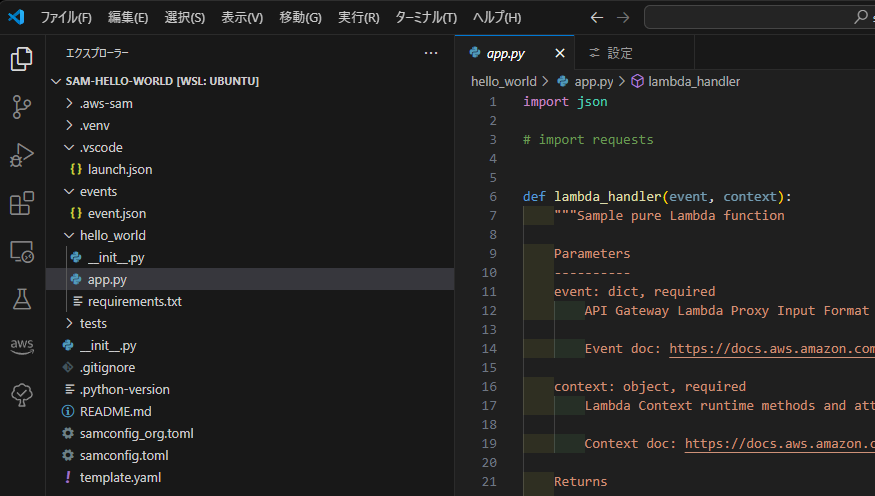
問題なく開けますね。
デバッグ構成を設定
記事に従って、デバッグ構成を設定します。当初は、
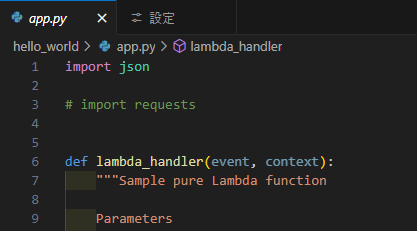
のように、デバッグ構成に関するヒントが出ていないので、設定を変更します。
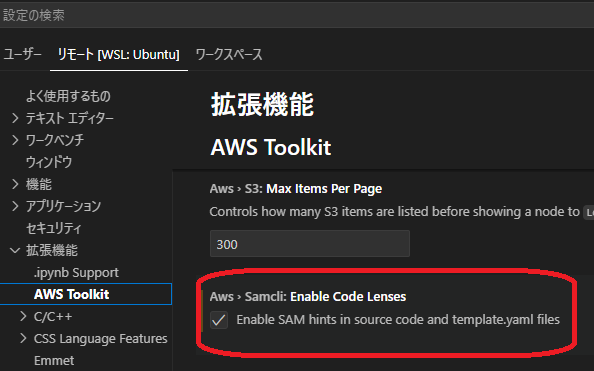
VSCode の設定を開いて、『拡張機能』、『AWS Toolkit』を選択して、『Enable Code Lens』にチェックを入れて有効にします。
設定後、再度 app.py を表示すると
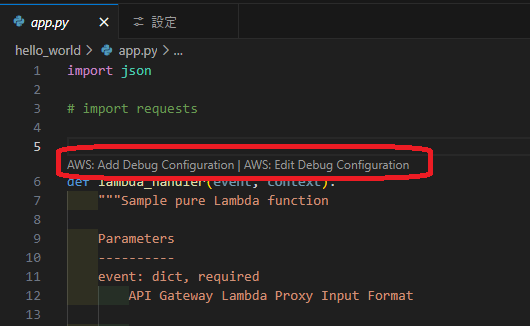
のように、デバッグ設定追加用のヒントが出るので、クリックします。クリックすると、
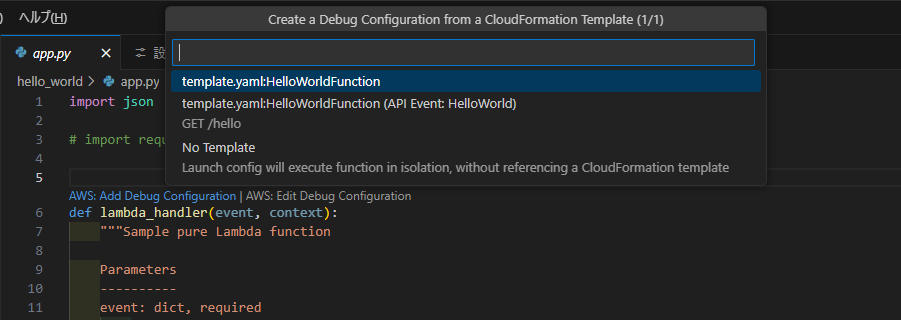
のように、どの構成を追加すると聞かれるので、最初は HelloWorldFunction を選択します。これは、 Lambda 関数を単体として動かす際の設定に該当します。
作成された launch.json は
{
    "configurations": [
        {
            "type": "aws-sam",
            "request": "direct-invoke",
            "name": "sam-hello-world:HelloWorldFunction",
            "invokeTarget": {
                "target": "template",
                "templatePath": "${workspaceFolder}/template.yaml",
                "logicalId": "HelloWorldFunction"
            },
            "lambda": {
                "payload": {},
                "environmentVariables": {}
            }
        }
    ]
}
こんな感じです。 Lambda は API Gateway 経由で呼ばれることが想定されているので、引数が必要になります。これを指定するために payload を
            "lambda": {
                "payload": {
                    "path": "${workspaceFolder}/events/event.json"
                },
                "environmentVariables": {}
            }
と修正します。テンプレートから作成した際の events/event.json はここで使うんですね。
次に、もう一度ヒントから『Add Debug Configuration』を選択して、『HelloWorldFunction(API Event) 』も追加しておきます。最終的に作成された launch.json はこんな感じになります。
{
    "configurations": [
        {
            "type": "aws-sam",
            "request": "direct-invoke",
            "name": "API sam-hello-world:HelloWorldFunction",
            "invokeTarget": {
                "target": "api",
                "templatePath": "${workspaceFolder}/template.yaml",
                "logicalId": "HelloWorldFunction"
            },
            "api": {
                "path": "/hello",
                "httpMethod": "get",
                "payload": {
                    "json": {}
                }
            }
        },
        {
            "type": "aws-sam",
            "request": "direct-invoke",
            "name": "sam-hello-world:HelloWorldFunction",
            "invokeTarget": {
                "target": "template",
                "templatePath": "${workspaceFolder}/template.yaml",
                "logicalId": "HelloWorldFunction"
            },
            "lambda": {
                "payload": {
                    "path": "${workspaceFolder}/events/event.json"
                },
                "environmentVariables": {}
            }
        }
    ]
}
VSCode で実行
サイドパネルの『実行とデバッグ』アイコンをクリックして、デバッグ構成として『 sam-hello-world:HelloWorldFunction 』を選択します。
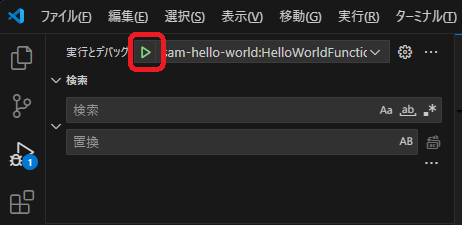
次に、画面上部の実行ボタンを押します。すると、ビルドが走り、ブレークポイントで止まります。
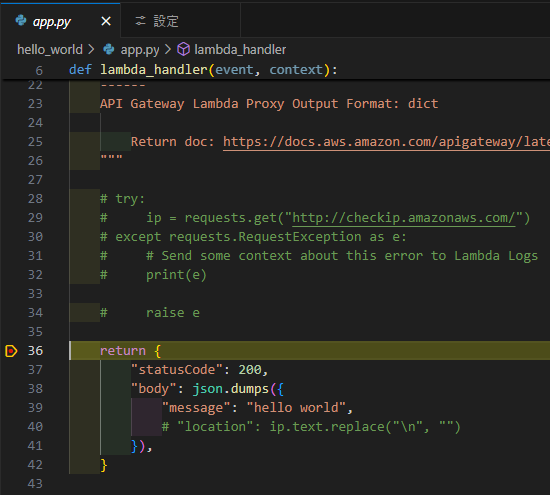
簡単ですね。デバッグ構成の payload で指定した events/event.json ファイルの中身が、lambda_hander にわたってきてるのがわかります。
一方、デバッグ構成で『API sam-hello-world:HelloWorldFunction』を選択すると、バックグラウンドでサーバーが起動して、サーバー経由でリクエストがある場合のデバッグになるようです。
素朴な疑問やけど、 VSCode で使う時、『API ~』のデバッグ構成って使うのかな?
この記事にも書いてあるけど、 SAM CLI のコマンドラインから、ローカルサーバーを立ち上げておいて、何度も修正するような場合は使うような気もするけどどうなんだろうか?このあたりは、ま、徐々に試していきましょう。
まとめ
これで、 Lmbda をローカルで実行やデバッグができるようになりました。次はこれを aws 上にデプロイしてみようと思います。