メールを IMAP に移行した場合、今までのようにメールクライアントからアクセスするのもありですが、せっかくなので、ブラウザベースでどこからでも見れるようにしたいと思います(メール提供者のWebメール使えばできますよね)。
そうなると、アカウント毎にWebメール画面にログインして、アクセスすることになりますが、全部のメールアドレスのパスワードなんて覚えられません。
こういう場合、よくある手は、 gmail を使って一か所で見れるようにするんでしょうが、なんとなく gmail は使いたくありません。
昔は gmail って、メールをスキャンして広告を出していた、というのが引っかかっていたんですが、今はそれももうないはずです(こちらの記事なご参考に)。
なので、本当は気にしなくていいんでしょうが、我ながらまだそれを引きづってるんでしょうか?なんとなく気になります。
非合理かもしれませんが嫌なものは嫌なんで、別の方法を考えます。
で、かなりあれこれ調べて、得られた結論としては、Webメールのソフトウェアをサーバーに入れて使おう、という形になりました(いろいろと調べた顛末はまた別途まとめます)。この時、はずせない機能としては、
- 1度のログインで、複数のアカウントのメールを見ることができる
というものです。 最終的に選んだのは、 Rainloop という Webメールソフトウェアです。
いまどきっぽい UI で、良さそうです。
早速、インストールして試してみたいと思います。
rainloop インストール
試用ということもあり、サーバーは EC2 のスポットインスタンスを使って立ち上げました。OS は Ubuntu 18.04 Server 版です。 apache2 / php 5.4 が動くようにしておきます。
System Requirements / Documentation / RainLoop Webmail
サーバーセットアップの詳細は、後ろに参考として書いておきますので、必要があればご覧ください。
rainloop インストール
公式の手順に従って作業すれば、インストールは非常に簡単です。
wget https://www.rainloop.net/repository/webmail/rainloop-community-latest.zip

sudo mkdir /var/www/html/rainloop
sudo unzip rainloop-community-latest.zip -d /var/www/html/rainloop/
パーミッション変更
cd /var/www/html
sudo chown -R www-data:www-data rainloop/
あと、インストールの際に作られた rainloop/data ディレクトリを保護する必要があります(ここに設定などがすべて入ります)。
公式のインストールの説明には、 Apache の場合、 .htaccess で対応しろとあります。
が、 rainloop/data に .htaccess がインストールされなくなったみたいです。
- https://github.com/RainLoop/rainloop-webmail/issues/1751
- https://github.com/RainLoop/rainloop-webmail/issues/1700
上記の2つ目にあるように conf ファイルを作成して対応します。
cd /etc/apache2/sites-available
sudo vi 000.conf
sudo a2ensite 000
sudo systemctl restart apache2
000.conf の内容はこちら
<Directory "/var/www/html/rainloop/data" >
    Require all denied
</Directory>
インストールはこれで終わりです。 サーバー準備するほうが手間がかかりましたね。
試用
公式のRrainloop の設定方法は以下にありますので、そちらを参考にして設定と試用してみます。
Documentation / Configuration / RainLoop Webmail
全体設定
まず、http://サーバーのURL/rainloop/?admin にアクセスすると管理画面が表示されます。
ユーザー名 admin, パスワード 12345 でアクセスするとログインできます。 ちなみに、dataディレクトリがアクセス可能になっている場合、下記のような警告画面が表示されます。
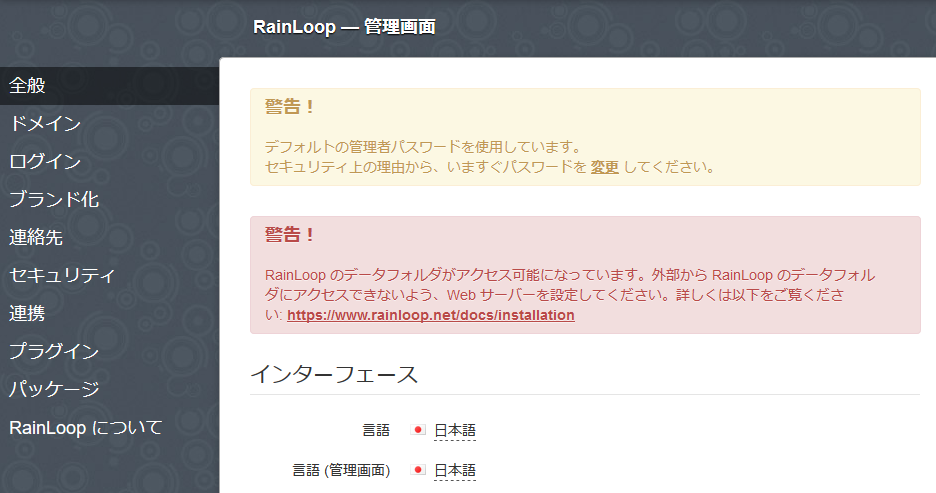
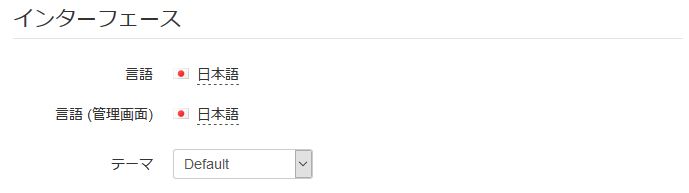
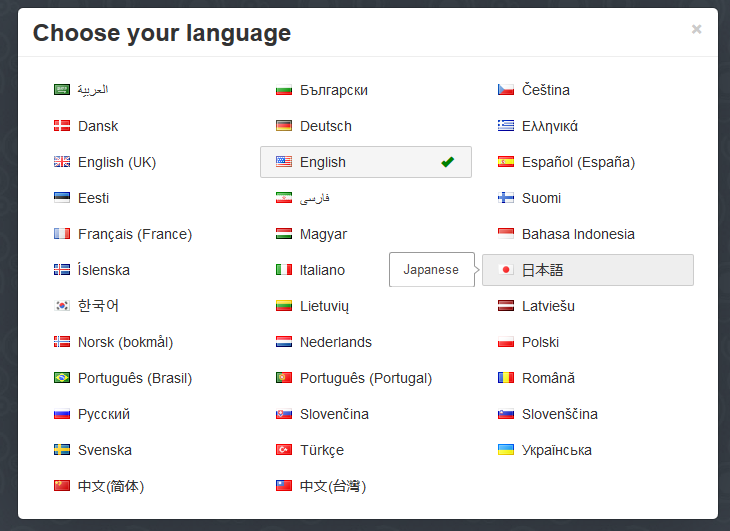
ログイン後、言語表示を変更すれば、日本語で表示できます。
Rainloop は管理者以外は独自のユーザーを持っていません。 Rainloop にログインする際のユーザー名は、メールアドレスとそのメールサーバーへアクセスするためのパスワードになります。
この時、どんなメールアドレスでも使えるのではなく、 Rainloop にドメインが登録されているメールアドレスを使います。 インストール直後は、gmail のみがドメインとして有効になっています。
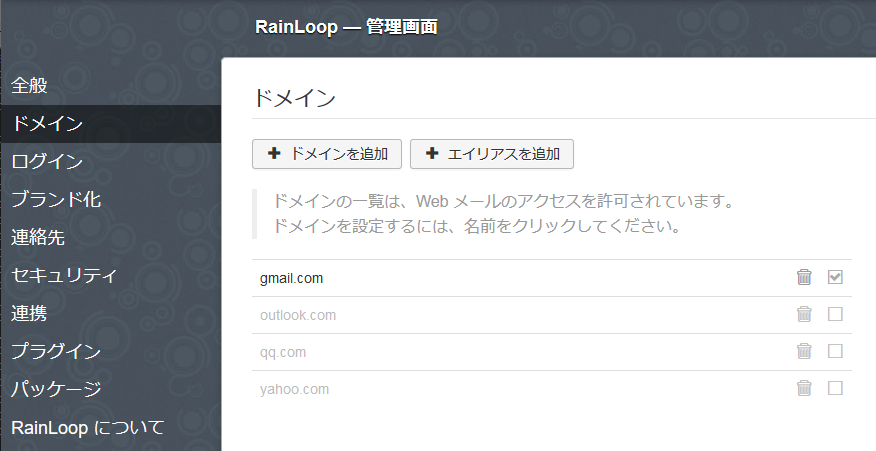
なので、例えば、 gmail がドメインに登録されているので、自分以外の知らない誰かがログインすることも可能になります(まあ、やらないと思いますが)。
さて、ここにドメインを追加することで、独自ドメインのメールアドレス等も扱えるようになります。
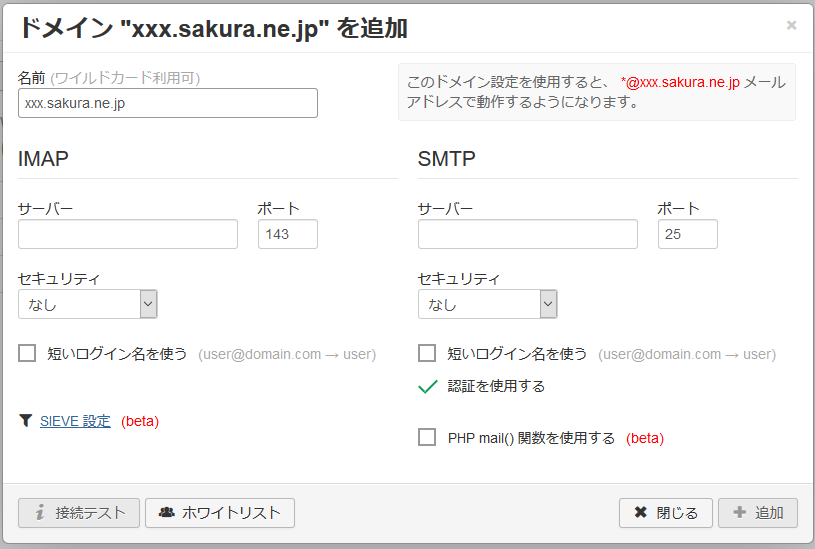
設定画面はこんな感じです。必要事項を記入して、『追加』ボタンを押せば完了です。
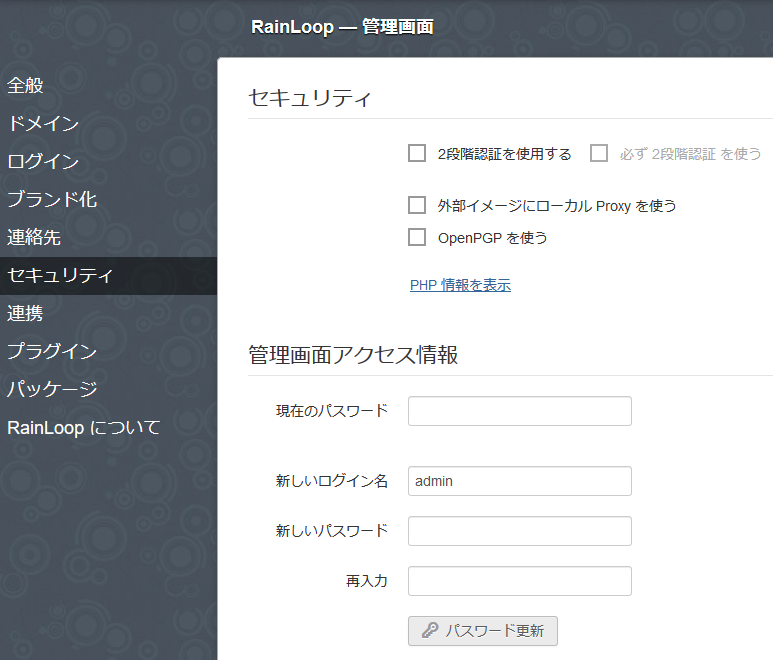
あとは、管理者アカウント名とパスワードの変更を行っておきます。
ログイン
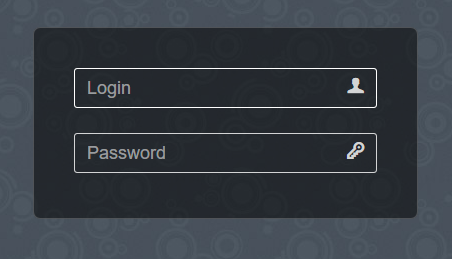
全体設定が終わったら、ログイン画面に移動します。
http://サーバーのURL/rainloop
にアクセスするとログイン画面が表示されます。
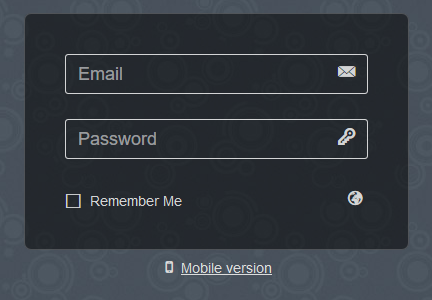
地球儀のアイコンをクリックすると、表示言語を変更することもできます。
ここでは、先ほど言ったように、登録済みのドメインのメールアドレスとパスワードでログインします。
ログインが成功すれば、メールが表示されます。
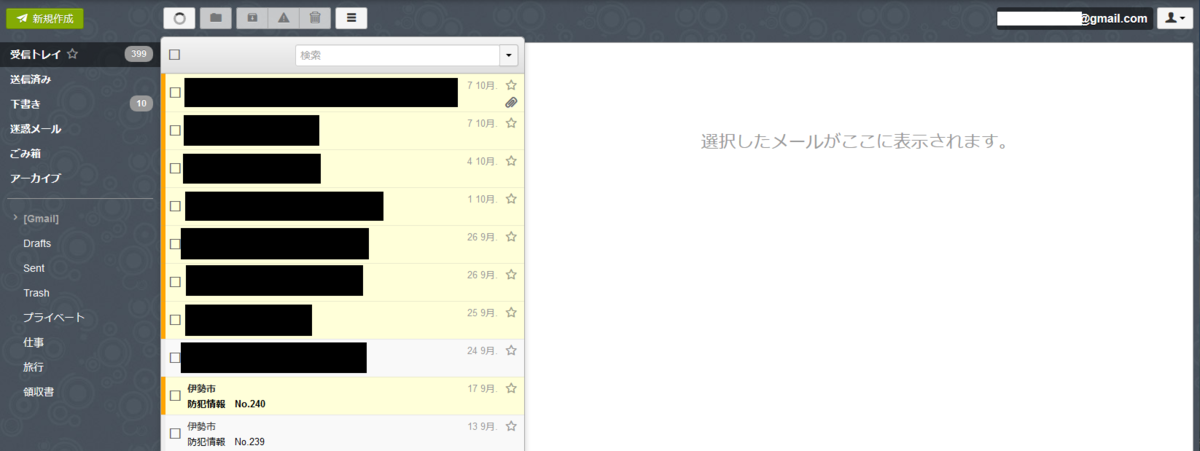
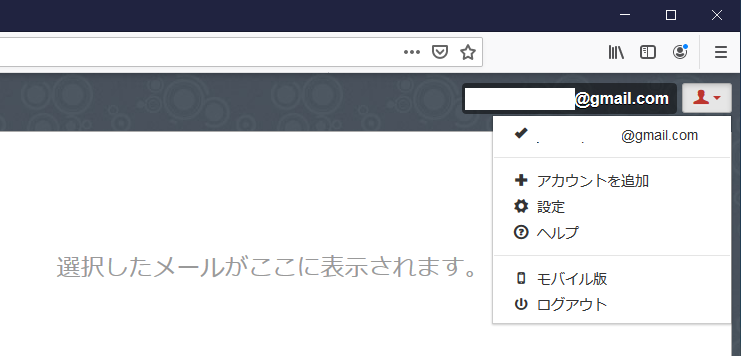
このメールアドレスでログインした状態で、他のメールアカウントを見るためには、右上にある人型のアイコンをクリックして、『アカウントを追加』を選びます。
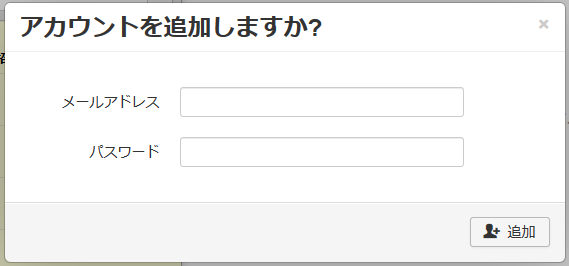
メールアドレスとパスワードが求められるので、入力して『追加』を押します。
問題なく追加できると、このように複数のメールアドレスが表示されます。
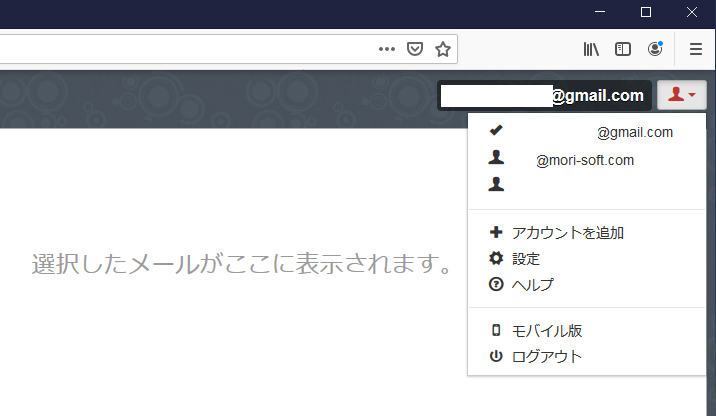
この状態で、他のメールアドレスを選択すると、そのメールアドレスに対するメール一覧に切り替わって表示されます。
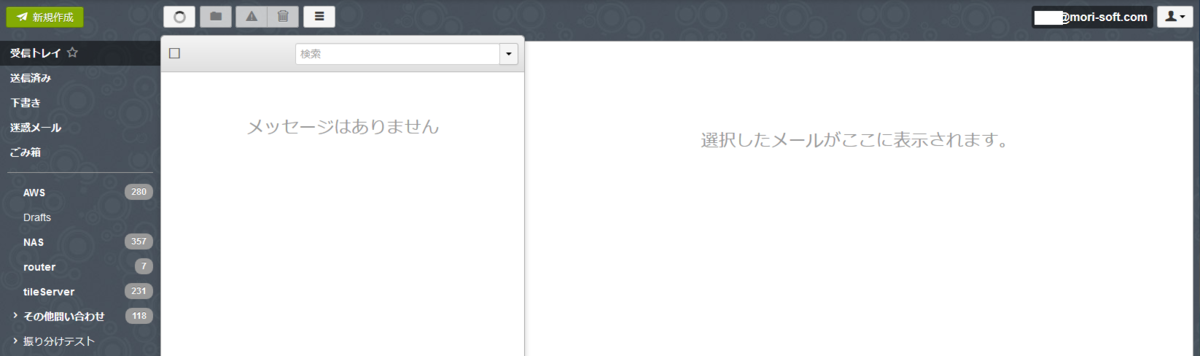
最初にログインしたメールアドレスのパスワードだけ覚えておけば、これでスマホも含めてどこからでもメールに快適にアクセスできます。
これはなかなか便利そうですね。
gmail について
なお、gmail でログインしようとすると単にパスワードを入れただけだとログインできないことがあります。 これは、gmail アカウントに対して二段階認証が有効になっているような場合です。
このような場合は、下記の手順に従って、アプリパスワードを発行します。
詳しくは上記の手順を読めばわかりますが、アプリパスワードは発行時に利用可能なGoogleのサービスを指定します。 gmailなら『メール』となります。このため、アプリパスワードを使った場合、それを発行する際に許可されたアプリ以外にはアクセスできません。
Rainloop のログイン時には、上記で『メール』を選択して発行したアプリパスワードをログイン時のパスワードに入力すればログインできるようになります。
まとめ
まだ本格的に使ってはいませんが、かなり便利に使えそうです。
一点注意しないといけないところがあります。
Rainloop 自体はメールそのものを保存せずに、一種の Web メールクライアント(という言い方あるのかな?)として振舞います。なので、 Rainloop 側にはアプリケーションの設定情報、メールアドレスやパスワードといった情報が含まれているだけです。
メールそのものは、各メールアドレスのメールボックス(メールサーバー側)に残ったままとなります。なので、メールのバックアップ等が必要な場合は、それぞれのメールサーバー側でバックアップを行ってください。
参考
サーバーのセットアップ
前述したように、サーバーは EC2 のスポットインスタンスを使って立ち上げました。OS は Ubuntu 18.04 Server 64bit 版です。 インスタンスが起動したら、各種設定を行っていきます。
ロケールを日本語に
sudo apt install language-pack-ja
sudo update-locale LANG=ja_JP.UTF-8
タイムゾーン変更
sudo timedatectl set-timezone Asia/Tokyo
Ubuntu16.04でtimezoneを変えたい - ふり返る暇なんて無いね
日本語パッケージの追加
wget -q https://www.ubuntulinux.jp/ubuntu-ja-archive-keyring.gpg -O- | sudo apt-key add -
wget -q https://www.ubuntulinux.jp/ubuntu-jp-ppa-keyring.gpg -O- | sudo apt-key add -
sudo wget https://www.ubuntulinux.jp/sources.list.d/bionic.list -O /etc/apt/sources.list.d/ubuntu-ja.list
sudo apt update
sudo apt upgrade
sudo apt-get dist-upgrade
Ubuntuの日本語環境 | Ubuntu Japanese Team
NTP サーバーの切り替え
cd /etc/systemd/
sudo cp -p timesyncd.conf timesyncd.conf.org
sudo vi timesyncd.conf
NTP=ntp.nict.jp
sudo systemctl restart systemd-timesyncd.service
【Ubuntu 18.04 LTS Server】時刻の同期について | The modern stone age.
apache2 / php
ここから apache2 / php をインストールして設定していきます。
sudo apt install apache2
sudo apt install php libapache2-mod-php
sudo apt install php-curl
sudo apt install php-xml  # DOM
sudo apt install unzip
apache2 の設定を変更します。 セキュリティ周りは下記記事を元に作業しています。
Ubuntu 18.04 + LAMP 環境構築 (2) – Apache 2.4 | 雑廉堂の雑記帳
Index, FollowSymLink を無効
ubuntu@ip-172-30-0-235:/etc/apache2$ diff apache2.conf.org apache2.conf
171c171
<       Options Indexes FollowSymLinks
---
>       Options -Indexes -FollowSymLinks
ubuntu@ip-172-30-0-235:/etc/apache2$
Apache2, OS のバージョン情報の隠ぺい、クリックジャッキング対策
ubuntu@ip-172-30-0-235:/etc/apache2/conf-available$ diff security.conf.org security.conf
25c25
< ServerTokens OS
---
> #ServerTokens OS
26a27
> ServerTokens Prod
35,36c36,37
< #ServerSignature Off
< ServerSignature On
---
> ServerSignature Off
> #ServerSignature On
70c71
< #Header set X-Frame-Options: "sameorigin"
---
> Header set X-Frame-Options: "sameorigin"
ubuntu@ip-172-30-0-235:/etc/apache2/conf-available$
sudo a2enmod headers
mod_evasive の導入
sudo apt install libapache2-mod-evasive
(途中でメールの設定を求められたら、そのままを選択)
/etc/apache2/mods-available/evasive.conf を編集
<IfModule mod_evasive20.c>
    DOSHashTableSize    3097
    #DOSPageCount        2
    DOSPageCount        5
    DOSSiteCount        50
    DOSPageInterval     1
    DOSSiteInterval     1
    DOSBlockingPeriod   10

    #DOSEmailNotify      you@yourdomain.com
    #DOSSystemCommand    "su - someuser -c '/sbin/... %s ...'"
    DOSLogDir           "/var/log/mod_evasive"

    DOSWhitelist        127.0.0.1
</IfModule>
※ DOSWhitelist はテスト後に追記
Rainloop をいろいろと触ってて、 DOSPageCount 2 だとしょっちゅうトラブルがあったので、制限を緩めてます。
ログディレクトリ作成
sudo mkdir /var/log/mod_evasive
sudo chown www-data. /var/log/mod_evasive
Apache2の再起動後、テスト
Apache DoS対策 mod_evasive の導入 - Qiita
上記サイトの方法でテストしてブロックされることを確認
mod_security(WAF)の導入
sudo apt install libapache2-mod-security2
sudo cp /etc/modsecurity/modsecurity.conf-recommended /etc/modsecurity/modsecurity.conf
modsecurity.conf の編集
ubuntu@ip-172-30-0-235:/etc/modsecurity$ diff modsecurity.conf-recommended modsecurity.conf
7c7,8
< SecRuleEngine DetectionOnly
---
> #SecRuleEngine DetectionOnly
> SecRuleEngine On
183c184,185
< SecAuditEngine RelevantOnly
---
> #SecAuditEngine RelevantOnly
> SecAuditEngine Off
ubuntu@ip-172-30-0-235:/etc/modsecurity$
とりあえずルールセットはデフォルトのままとして、問題があれば見直すこととする。 Apache2再起動後、テスト
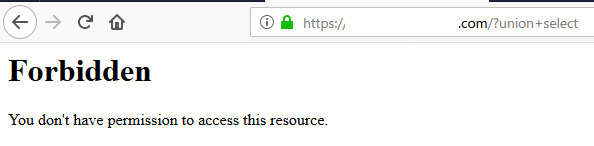
SQLのクエリパラメータをつけたら、403 Forbbiden になってるのでとりあえずOK。
SSL 証明書の取得
Let's Encrypt の証明書を入手して、SSLを設定します。
Ubuntu 18.04 LTS : SSL証明書を取得する(Let's Encrypt) : Server World
まずは、SSL 証明書の入手
ubuntu@ip-172-30-0-235:~$ sudo apt install certbot

ubuntu@ip-172-30-0-235:~$ sudo certbot certonly --webroot -w /var/www/html -d 証明書を発行するドメイン名
Saving debug log to /var/log/letsencrypt/letsencrypt.log
Plugins selected: Authenticator webroot, Installer None
Enter email address (used for urgent renewal and security notices) (Enter 'c' to
cancel): メールアドレスを入力

-------------------------------------------------------------------------------
Please read the Terms of Service at
https://letsencrypt.org/documents/LE-SA-v1.2-November-15-2017.pdf. You must
agree in order to register with the ACME server at
https://acme-v01.api.letsencrypt.org/directory
-------------------------------------------------------------------------------
(A)gree/(C)ancel: a

-------------------------------------------------------------------------------
Would you be willing to share your email address with the Electronic Frontier
Foundation, a founding partner of the Let's Encrypt project and the non-profit
organization that develops Certbot? We'd like to send you email about EFF and
our work to encrypt the web, protect its users and defend digital rights.
-------------------------------------------------------------------------------
(Y)es/(N)o: n
Obtaining a new certificate
Performing the following challenges:
http-01 challenge for 証明書を発行するドメイン名
Using the webroot path /var/www/html for all unmatched domains.
Waiting for verification...
Cleaning up challenges

IMPORTANT NOTES:
 - Congratulations! Your certificate and chain have been saved at:
   /etc/letsencrypt/live/証明書を発行するドメイン名/fullchain.pem
   Your key file has been saved at:
   /etc/letsencrypt/live/証明書を発行するドメイン名/privkey.pem
   Your cert will expire on 2020-01-06. To obtain a new or tweaked
   version of this certificate in the future, simply run certbot
   again. To non-interactively renew *all* of your certificates, run
   "certbot renew"
 - Your account credentials have been saved in your Certbot
   configuration directory at /etc/letsencrypt. You should make a
   secure backup of this folder now. This configuration directory will
   also contain certificates and private keys obtained by Certbot so
   making regular backups of this folder is ideal.
 - If you like Certbot, please consider supporting our work by:

   Donating to ISRG / Let's Encrypt:   https://letsencrypt.org/donate
   Donating to EFF:                    https://eff.org/donate-le

ubuntu@ip-172-30-0-235:~$
Let's Encrypt の証明書は有効期限が90日なので、残り30日を切ったら更新処理を行う必要があります。 でも、パッケージをインストールすると、/etc/cron.d に更新スクリプトも一緒にインストールされます(多分ちゃんとどうさするよね?)。
証明書の更新について Let'sEncryptの取得&自動更新設定してみた(CentOS7.1&Apache2.4.6) - Qiita
https 設定
下記に従って、SSL 設定を行います。
Ubuntu 18.04 LTS : Apache2 : SSLの設定 : Server World
/etc/apache2/sites-available/default-ssl.conf 設定ファイル
               SSLCertificateFile      /etc/letsencrypt/live/証明書を発行するドメイン名/cert.pem
               SSLCertificateKeyFile   /etc/letsencrypt/live/証明書を発行するドメイン名/privkey.pem
               SSLCertificateChainFile /etc/letsencrypt/live/証明書を発行するドメイン名/chain.pem
SSL を有効にする
ubuntu@ip-172-30-0-235:/etc/apache2/sites-available$ sudo a2ensite default-ssl
Enabling site default-ssl.
To activate the new configuration, you need to run:
  systemctl reload apache2
ubuntu@ip-172-30-0-235:/etc/apache2/sites-available$

ubuntu@ip-172-30-0-235:/etc/apache2$ sudo a2enmod ssl
Considering dependency setenvif for ssl:
Module setenvif already enabled
Considering dependency mime for ssl:
Module mime already enabled
Considering dependency socache_shmcb for ssl:
Enabling module socache_shmcb.
Enabling module ssl.
See /usr/share/doc/apache2/README.Debian.gz on how to configure SSL and create self-signed certificates.
To activate the new configuration, you need to run:
  systemctl restart apache2
ubuntu@ip-172-30-0-235:/etc/apache2$
http -> https リダイレクト
最後に http でのアクセスを https にリダイレクトするようにします。
rewrite エンジンを有効にします。
ubuntu@ip-172-30-0-235:/etc/apache2$ sudo a2enmod rewrite
Enabling module rewrite.
To activate the new configuration, you need to run:
  systemctl restart apache2
ubuntu@ip-172-30-0-235:/etc/apache2$
/etc/apache2/sites-available/000-default.conf を編集して、下記を追記
         RewriteEngine On
         RewriteCond %{HTTPS} off
         RewriteRule ^(.*)$ https://%{HTTP_HOST}%{REQUEST_URI} [R=301,L]
Apache2 を再起動しておく
http でアクセスして、 https にリダイレクトされればOK
とりあえずは以上で設定終わりです。