プログラマーのメモ書き

伊勢在住のプログラマーが気になることを気ままにメモったブログです

Thinkpad T410 の HDD を SSD に換装

先日、下記の記事で書いたように Thinkpad T410 を Windows 7 から 10 にアップグレードしました。

blog.mori-soft.com

そこでも触れたように、 HDD を SSD に換装して、もうちょっと快適に使えるようにしたので、メモっておきます。

SSD の購入

ずいぶんと古い機種なので、果たして今どきの SSD がつながるのか不安でしたが、T410 のSSD 換装を調べてみるといくつも記事が見つかりました。

ThinkPad T410のSSD換装 | 太陽光発電と農業で脱サラ

ちょうど上記記事で使っていることもあるし、以前購入したこともあるので、今回も Crucial の SSD, MX500 250GB にしました。 あ、現在のHDD容量が 250GB なので、同じサイズということですね。

参考までに、後日、Crucial のサイトでも T410 の換装用に紹介されてたのが見つかったので、リンク張っておきます。

メモリRAMおよびSSDアップグレード | lenovo | thinkpad t series | ThinkPad T410 Series | Crucial JA

HDD -> SSD の換装

実際の換装の手順ですが、基本的には、 Crucial のサイトに手順が載ってるので、それに従えば問題ないです。

www.crucial.jp

せっかくなので、やったことをメモしておきます。

HDD のクローン

HDDをSSDにクローンします。Crucial の場合、クローニングソフトが使えるので、それを利用します。

まずは SSD を USB 接続します。USB との接続には少し前に購入していた下記のケーブルを使いました。

電源アダプタに接続後、USBにつなげるとランプが光って認識されたことがわかります。

f:id:junichim:20200518084237j:plain

次に Acronis True Image for Crucial をダウンロードして、インストールします(サイトのURLは前述の Crucial のガイド中にで紹介されているので、最新の情報はそちらを確認してください)。

インストールが終了したら、おもむろに起動します。

f:id:junichim:20200518085029p:plain

『ツール』の『ディスクのクローン作成』を選択します。

ウィザードが起動するので、クローンモードとして今回は『自動』を選択します。

f:id:junichim:20200518085049p:plain

自動モードでも、クローン元とクローン先の容量が異なる場合にはパーティションサイズを調整してくれるそうです。手動を選べば自分でもパーティションサイズなどを調整できるようです。詳しくは、 Acronis True Image for Crucial のユーザーガイドをご覧ください。

ソースディスクを選択します。

f:id:junichim:20200518085152p:plain

1台しかないので選択の余地がないですね。

次に、ターゲットディスクを選択します。

f:id:junichim:20200518085231p:plain

USB 接続した SSD を選びます。

f:id:junichim:20200518085308p:plain

自動の場合はこれで設定完了です。

『実行』ボタンを押すと、クローニングが始まります。T410の USB 3.0 の端子が調子悪くて、 2.0 の端子につないでいたこともあるためか、クローニングが完了するまで大体1時間45分ぐらいかかりました。

画面に『完了しました』の旨のメッセージが表示されれば終了です。

換装

次はいよいよ、 HDDの換装です。T410の場合は、HDDの交換は非常に簡単です。ネット上に、Lenovo 公式の交換手順がありましたので、そちらも載せておきます。

ハードディスク・ドライブ (HDD) スロット・カバー, HDD と HDD ゴム製レールまたは ソリッド・ステートドライブ (SSD) とストレージ・コンバーターの取り付け/取り外し手順 - ThinkPad T410, T410i - JP

クローン終了後、一旦シャットダウンします。次に、バッテリーを外します。その状態で何度か電源ボタンを押しておきます。

筐体を裏返しにして、

f:id:junichim:20200518085859j:plain

f:id:junichim:20200518090015j:plain

右下にあるネジを外してからカバーを取ります。こんな感じになってます。

f:id:junichim:20200518090104j:plain

上記の手順を見ると引っ張って取り出すためのベロのようなものがついてるっぽいのですが、最初これがよくわからずに戸惑いました。よく見ると中央のプラスチックの黒い部分が動くので、手前に引き出してみると、

f:id:junichim:20200518090333j:plain

と、ベロが出てきました。こうなれば、あとは簡単ですね。このベロを引っ張れば、HDDを取り出すことができます。

f:id:junichim:20200518090448j:plain

f:id:junichim:20200518090545j:plain

あとは、左右のゴムのカバー(スライドレール?)を外せば、

f:id:junichim:20200518090651j:plain

f:id:junichim:20200518090707j:plain

HDD を止めているネジが出てくるので、SSDに交換します。

f:id:junichim:20200518090815j:plain

あとは、外した手順を逆にたどって、取り付ければ完了です。

動作確認

全て元通りにしたら、動作確認をしておきます。

電源を入れると何事もなかったかのように Windows 10 が起動します。ログイン後も特に問題なく動作しています。 起動および起動後も動作も若干快適になったように感じます。まあ、面倒なのでベンチマークは取りませんが、これでもう少し使えそうです。

余談

SSD に換装前の HDD のパーティションはこんな感じでした。ディスク0が換装前のHDD、ディスク1がUSB接続した直後のSSDになります。

f:id:junichim:20200518091216p:plain

Windows 10 にアップグレードする際に Thinkpad の Rescue and Recovery もアンインストールしているので、Qのドライブレターを割り当てているパーティションとかも不要になっているはずです。

今回は、パーティション構成もそのままでクローンしましたが、気が向いたらこれらの不要パーティションも消したいと思います(もっとも、空き容量的に困ってるわけではないのでいつになるやらわかりませんが・・・)。

EC2 の Ubuntu で apt upgrade した場合について

こちらの記事『 Let's Encrypt のプロトコルを ACME v1 -> ACME v2 に変更しました』 に書いたように、作業ミスにより、

sudo apt upgrade

を実行してしまいました。

システムに大きな変更はしていないので、特に問題もなくパッケージの更新が終わると思いきや、下記画面が表示されて grub の再設定を求められました。

f:id:junichim:20200514094929p:plain

とりあえずは、 grub はどこにもインストールしないとして進むと次に

f:id:junichim:20200514095032p:plain

と menu.lst が変更されてるのでどうするか?と聞かれます。

とりあえず、『現在インストールされているローカルバージョンを保持』を選択して、処理終了後一度再起動したら、問題なく動作しました。

このままだと気持ち悪いので、何が起きていたのか調べてみました。

問題

今回、この問題が発生した環境は EC2 上の Ubuntu 18.04 になります(ami-0eeb679d57500a06c)。

ネットを調べてみると類似の問題が昔からあるようです。いくつかの記事を見ていると、 apt upgrade --yes としても対話プロンプトが出てくるので自動更新できない、といった感じのものが多いようです。

amazon ec2 - "A new version of /boot/grub/menu.lst is available" when upgrading Ubuntu on an AWS server - Server Fault

(上記の機械翻訳っぽい記事)

AWSサーバーでUbuntuをアップグレードする場合の「/boot/grub/menu.lstの新しいバージョンが利用可能」

linux - How to avoid GRUB errors after running apt-get upgrade - Ubuntu - Server Fault

どうも、EC2 は起動する際に grub-legacy を使っているのに対して、 grub2 の設定とぶつかっているっぽい印象です。

システム更新後ですが、 grub 関連のパッケージはこんな感じに入っているようです。

ubuntu@ip-xxx-xxx-xxx-xxx:~$ dpkg --list | grep -i grub
ii  grub-common                      2.02-2ubuntu8.15                    amd64        GRand Unified Bootloader (common files)
ii  grub-gfxpayload-lists            0.7                                 amd64        GRUB gfxpayload blacklist
ii  grub-legacy-ec2                  1:1                                 all          Handles update-grub for ec2 instances
ii  grub-pc                          2.02-2ubuntu8.15                    amd64        GRand Unified Bootloader, version 2 (PC/BIOS version)
ii  grub-pc-bin                      2.02-2ubuntu8.15                    amd64        GRand Unified Bootloader, version 2 (PC/BIOS binaries)
ii  grub2-common                     2.02-2ubuntu8.15                    amd64        GRand Unified Bootloader (common files for version 2)
ubuntu@ip-xxx-xxx-xxx-xxx:~$ 

最初の画面のプロンプトをよく見ると『 grub-pc の設定』とあったので、その grub-pc パッケージの詳細を表示させるとこんな感じでした。

ubuntu@ip-xxx-xxx-xxx-xxx:~$ apt show grub-pc
Package: grub-pc
Version: 2.02-2ubuntu8.15
Priority: optional
Section: admin
Source: grub2
Origin: Ubuntu
Maintainer: Ubuntu Developers <ubuntu-devel-discuss@lists.ubuntu.com>
Original-Maintainer: GRUB Maintainers <pkg-grub-devel@lists.alioth.debian.org>
Bugs: https://bugs.launchpad.net/ubuntu/+filebug
Installed-Size: 577 kB
Depends: debconf (>= 0.5) | debconf-2.0, grub-common (= 2.02-2ubuntu8.15), grub2-common (= 2.02-2ubuntu8.15), grub-pc-bin (= 2.02-2ubuntu8.15), ucf, grub-gfxpayload-lists
Conflicts: grub (<< 0.97-54), grub-coreboot, grub-efi-amd64, grub-efi-ia32, grub-ieee1275, grub-legacy, grub-xen
Replaces: grub, grub-common (<= 1.97~beta2-1), grub-coreboot, grub-efi-amd64, grub-efi-ia32, grub-ieee1275, grub-legacy, grub2 (<< 2.02-2ubuntu8.15)
Homepage: http://www.gnu.org/software/grub/
Task: ubuntu-live, kubuntu-live, xubuntu-live, lubuntu-live-share, lubuntu-live, lubuntu-live-qt, lubuntu-live-gtk, ubuntustudio-dvd-live, ubuntukylin-live, ubuntu-mate-live, ubuntu-budgie-live
Supported: 5y
Download-Size: 138 kB
APT-Manual-Installed: no
APT-Sources: http://ap-northeast-1.ec2.archive.ubuntu.com/ubuntu bionic-updates/main amd64 Packages
Description: GRand Unified Bootloader バージョン 2 (PC/BIOS バージョン)
 GRUB は移植可能で強力なブートローダです。このバージョンの GRUB は前のバー
 ジョンよりもきれいな設計に基づいており、また以下のような新しい特徴を持って います。
 .
  - Scripting in grub.cfg using BASH-like syntax.
  - Support for modern partition maps such as GPT.
  - Modular generation of grub.cfg via update-grub.  Packages providing GRUB
    add-ons can plug in their own script rules and trigger updates by invoking
    update-grub.
  - VESA-based graphical mode with background image support and complete 24-bit
    color set.
  - Support for extended charsets.  Users can write UTF-8 text to their menu
    entries.
 .
 このパッケージには、伝統的な PC/BIOS アーキテクチャで使うために構築された バージョンの GRUB が含まれています。

N: 追加レコードが 1 件あります。表示するには '-a' スイッチを付けてください。
ubuntu@ip-xxx-xxx-xxx-xxx:~$ 

grub2 を扱うためのパッケージのようです。一方 grub-legacy-ec2 パッケージを表示させると

ubuntu@ip-xxx-xxx-xxx-xxx:~$ apt show grub-legacy-ec2
Package: grub-legacy-ec2
Version: 1:1
Priority: extra
Section: admin
Origin: Ubuntu
Maintainer: Ubuntu Developers <ubuntu-devel-discuss@lists.ubuntu.com>
Bugs: https://bugs.launchpad.net/ubuntu/+filebug
Installed-Size: 82.9 kB
Depends: debconf (>= 1.5.19) | cdebconf, ucf, debconf (>= 0.5) | debconf-2.0
Suggests: grub-legacy-doc
Conflicts: grub
Task: cloud-image, server
Supported: 5y
Download-Size: 19.4 kB
APT-Manual-Installed: no
APT-Sources: http://ap-northeast-1.ec2.archive.ubuntu.com/ubuntu bionic/main amd64 Packages
Description: Handles update-grub for ec2 instances
 EC2 instances that use grub-legacy as a bootloader need a way to keep
 /boot/grub/menu.lst up to date while not conflicting with grub-pc.
 This package provides that.

ubuntu@ip-xxx-xxx-xxx-xxx:~$ 

とあり、EC2 で grub-legacy を使うためのパッケージのようです。

回避策

基本的にサーバーで apt upgrade はやらないのですが、さきほど挙げた記事に回避策が載っているので、念のため実行しておきます。

ubuntu@ip-xxx-xxx-xxx-xxx:~$ sudo apt-get update
ubuntu@ip-xxx-xxx-xxx-xxx:~$ sudo mv /boot/grub/menu.lst /boot/grub/menu.lst.org
ubuntu@ip-xxx-xxx-xxx-xxx:~$ sudo update-grub-legacy-ec2 -y
Searching for GRUB installation directory ... found: /boot/grub
Searching for default file ... found: /boot/grub/default
Testing for an existing GRUB menu.lst file ... 

Could not find /boot/grub/menu.lst file. 
Generating /boot/grub/menu.lst
Searching for splash image ... none found, skipping ...
Found kernel: /boot/vmlinuz-5.3.0-1017-aws
Found kernel: /boot/vmlinuz-4.15.0-1052-aws
Found kernel: /boot/vmlinuz-4.15.0-1044-aws
Updating /boot/grub/menu.lst ... done

ubuntu@ip-xxx-xxx-xxx-xxx:~$ 
ubuntu@ip-xxx-xxx-xxx-xxx:~$ sudo apt-get dist-upgrade
ubuntu@ip-xxx-xxx-xxx-xxx:~$ sudo apt autoremove --purge
ubuntu@ip-xxx-xxx-xxx-xxx:~$ sudo reboot

これで問題なく更新できるようになるようです。

Let's Encrypt のプロトコルを ACME v1 -> ACME v2 に変更しました

少し前に、 Let's Encrypt から下記のようなメールが来てました。

Hi,

According to our records, the software client you're using to get Let's 
Encrypt TLS/SSL certificates issued or renewed at least one HTTPS certificate 
in the past two weeks using the ACMEv1 protocol. Here are the details of one 
recent ACMEv1 request from each of your account(s):

Client IP address:  xxx.xxx.xxx.xxx

User agent:  CertbotACMEClient/0.23.0 (certbot; Ubuntu 18.04.2 LTS) Authenticator/webroot Installer/None (renew; flags: n) Py/3.6.8 

Hostname(s):  "xxxxx.example.com" 

Request time:  2020-04-17 05:28:17 UTC 

Beginning June 1, 2020, we will stop allowing new domains to validate using 
the ACMEv1 protocol. You should upgrade to an ACMEv2 compatible client before 
then, or certificate issuance will fail. For most people, simply upgrading to 
the latest version of your existing client will suffice. You can view the 
client list at: https://letsencrypt.org/docs/client-options

If you're unsure how your certificate is managed, get in touch with the 
person who installed the certificate for you. If you don't know who to 
contact, please view the help section in our community forum at 
https://community.letsencrypt.org/c/help and use the search bar to check if 
there's an existing solution for your question. If there isn't, please create 
a new topic and fill out the help template.

ACMEv1 API deprecation details can be found in our community forum: 
https://community.letsencrypt.org/t/end-of-life-plan-for-acmev1

As a reminder: In the future, Let's Encrypt will be performing multiple 
domain validation requests for each domain name when you issue a certificate. 
While you're working on migrating to ACMEv2, please check that your system 
configuration will not block validation requests made by new Let's Encrypt IP 
addresses, or block multiple matching requests. Per our FAQ 
(https://letsencrypt.org/docs/faq), we don't publish a list of IP addresses 
we use to validate, and this list may change at any time.

To receive more frequent updates, subscribe to our API Announcements: 
https://community.letsencrypt.org/t/about-the-api-announcements-category 

Thank you for joining us on our mission to create a more secure and privacy-
respecting Web!

All the best,

Let's Encrypt

どうも、

Let's Encrypt の更新で使っているプロトコル ACME v1 が古いので ACME v2 に変更してください。 変更しないと更新できなくなりますよ。

ということのようです(2020/6/1という日付は、 ACME v1 での新規ドメインの受付を停止する期日なので、すぐさま更新できなくなるわけではないようです)。

ということなので、 ACME v2 を使うようにしてみます。

certbot の更新

上記のメールを読むと、クライアント(こちらの記事でセットアップした Rainloop のサーバーなので、クライアントは certbot になります)を更新すればOKだよ、とあるので、とりあえず更新してみます。

現在の certbot のバージョンが 0.23.0 だったので、

ubuntu@ip-xxx-xxx-xxx-xxx:~$ apt list --upgradable | grep -i cert 

で確認すると certbot のバージョンは 0.27 でした。

これもちょっと古いっぽいです。

ソースコードから入れなきゃいけないのかなと思いつつもうちょっと調べてみると、 certbot の提供元のサイトで OS とWebサーバーを入力したら、PPA を追加したら最新版が使えそうなことがわかりました。

Certbot - Ubuntubionic Apache

追加してみます。

ubuntu@ip-xxx-xxx-xxx-xxx:~$ sudo add-apt-repository ppa:certbot/certbot
 This is the PPA for packages prepared by Debian Let's Encrypt Team and backported for Ubuntu.

Note: Packages are only provided for currently supported Ubuntu releases.
 詳しい情報: https://launchpad.net/~certbot/+archive/ubuntu/certbot
[ENTER] を押すと続行します。Ctrl-c で追加をキャンセルできます。

ヒット:1 http://archive.ubuntulinux.jp/ubuntu bionic InRelease
ヒット:2 http://archive.ubuntulinux.jp/ubuntu-ja-non-free bionic InRelease                                                                                                             
ヒット:3 http://ap-northeast-1.ec2.archive.ubuntu.com/ubuntu bionic InRelease                                                                                                          
ヒット:4 http://ap-northeast-1.ec2.archive.ubuntu.com/ubuntu bionic-updates InRelease                                                                                                  
ヒット:5 http://ap-northeast-1.ec2.archive.ubuntu.com/ubuntu bionic-backports InRelease                                
取得:6 http://ppa.launchpad.net/certbot/certbot/ubuntu bionic InRelease [21.3 kB]                                      
ヒット:7 http://security.ubuntu.com/ubuntu bionic-security InRelease                         
取得:8 http://ppa.launchpad.net/certbot/certbot/ubuntu bionic/main amd64 Packages [8,032 B]  
取得:9 http://ppa.launchpad.net/certbot/certbot/ubuntu bionic/main Translation-en [4,176 B]
33.5 kB を 2秒 で取得しました (19.4 kB/s)                      
パッケージリストを読み込んでいます... 完了
ubuntu@ip-xxx-xxx-xxx-xxx:~$ 

確認してみます。

ubuntu@ip-xxx-xxx-xxx-xxx:~$ sudo apt update
ubuntu@ip-xxx-xxx-xxx-xxx:~$ apt list --upgradable | grep certbot

WARNING: apt does not have a stable CLI interface. Use with caution in scripts.

certbot/bionic 0.31.0-1+ubuntu18.04.1+certbot+1 all [0.23.0-1 からアップグレード可]
python3-acme/bionic 0.31.0-2+ubuntu18.04.3+certbot+2 all [0.22.2-1ubuntu0.1 からアップグレード可]
python3-certbot/bionic 0.31.0-1+ubuntu18.04.1+certbot+1 all [0.23.0-1 からアップグレード可]
python3-configobj/bionic 5.0.6-2+ubuntu18.04.1+certbot+1 all [5.0.6-2 からアップグレード可]
python3-future/bionic 0.15.2-4+ubuntu18.04.1+certbot+3 all [0.15.2-4ubuntu2 からアップグレード可]
python3-josepy/bionic 1.1.0-2+ubuntu18.04.1+certbot+1 all [1.1.0-1 からアップグレード可]
python3-parsedatetime/bionic 2.4-3+ubuntu18.04.1+certbot+3 all [2.4-2 からアップグレード可]
python3-zope.component/bionic 4.3.0-1+ubuntu18.04.1+certbot+3 all [4.3.0-1 からアップグレード可]
python3-zope.hookable/bionic 4.0.4-4+ubuntu18.04.1+certbot+1 amd64 [4.0.4-4build4 からアップグレード可]
python3-zope.interface/bionic 4.3.2-1+ubuntu18.04.1+certbot+1 amd64 [4.3.2-1build2 からアップグレード可]
ubuntu@ip-xxx-xxx-xxx-xxx:~$ 

0.31.0 が使えるようです。

certbot の更新

本当は certbot だけ更新すればよかったのですが、何を思ったか勢い余って、

ubuntu@ip-xxx-xxx-xxx-xxx:~$ sudo apt upgrade

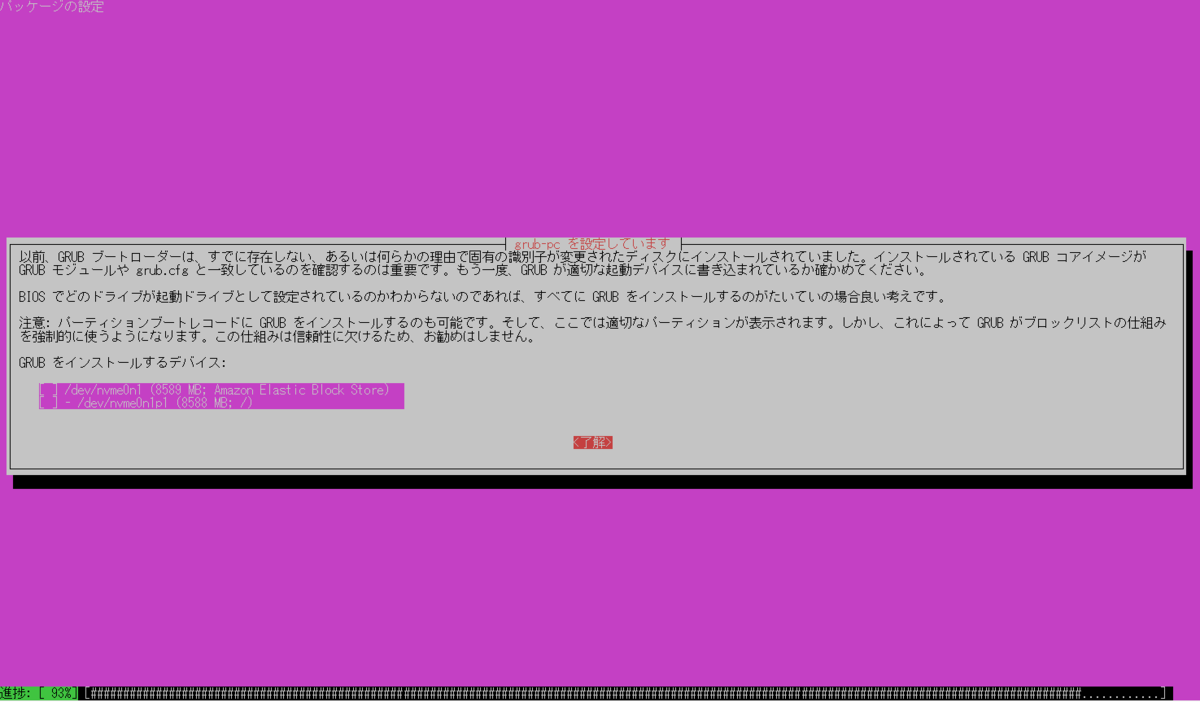
でシステム全体のアップグレードをしてしまいました。我ながらイケてないですね。

一応、書いておくと、アップグレード中に

設定ファイル '/etc/cron.d/certbot'
 ==> これはインストールしてから (あなたかスクリプトによって) 変更されています。
 ==> パッケージ配布元が更新版を提供しています。
   どうしますか? 以下の選択肢があります:
    Y か I  : パッケージメンテナのバージョンをインストールする
    N か O  : 現在インストールされている自分のバージョンを残す
      D     : 両バージョンの差異を表示する
      Z     : 状況を調査するためにシェルを開始する
 デフォルトでは現在使っている自分のバージョンを残します。
*** certbot (Y/I/N/O/D/Z) [デフォルト=N] ? 

と聞かれたので、デフォルトのNを選びました。

更新した certbot のバージョンを確認すると

ubuntu@ip-xxx-xxx-xxx-xxx:~$ certbot --version
certbot 0.31.0
ubuntu@ip-xxx-xxx-xxx-xxx:~$ 

無事 0.31.0 になっているようでした。

ACME v2 を利用していることの確認

さて、これで本当に問題ないのか不安です。そこで、 ACME v2 を使っている確認を行ってみました。

Let's Encrypt のサイトに下記の記述があり

Update your client software to continue using Let's Encrypt - Help - Let's Encrypt Community Support

--dry-run 付で renew を実行して、v2 のステージング環境につながっていればよいような感じです。

日本語の記事もありました。

Let’s EncryptのCertbot向けACMEv2対応手順(Update your client software to continue using Let’s Encrypt) – 株式会社ルーター

試してみます。

ubuntu@ip-xxx-xxx-xxx-xxx:~$ sudo certbot renew --force-renew --dry-run --webroot-path /var/www/html/ドキュメントルート
Saving debug log to /var/log/letsencrypt/letsencrypt.log

- - - - - - - - - - - - - - - - - - - - - - - - - - - - - - - - - - - - - - - -
Processing /etc/letsencrypt/renewal/xxxxx.example.com.conf
- - - - - - - - - - - - - - - - - - - - - - - - - - - - - - - - - - - - - - - -
Plugins selected: Authenticator webroot, Installer None
Renewing an existing certificate
Performing the following challenges:
http-01 challenge for xxxxx.example.com
Using the webroot path /var/www/html/ドキュメントルート for all unmatched domains.
Waiting for verification...
Cleaning up challenges

- - - - - - - - - - - - - - - - - - - - - - - - - - - - - - - - - - - - - - - -
new certificate deployed without reload, fullchain is
/etc/letsencrypt/live/xxxxx.example.com/fullchain.pem
- - - - - - - - - - - - - - - - - - - - - - - - - - - - - - - - - - - - - - - -

- - - - - - - - - - - - - - - - - - - - - - - - - - - - - - - - - - - - - - - -
** DRY RUN: simulating 'certbot renew' close to cert expiry
**          (The test certificates below have not been saved.)

Congratulations, all renewals succeeded. The following certs have been renewed:
  /etc/letsencrypt/live/ドメイン名/fullchain.pem (success)
** DRY RUN: simulating 'certbot renew' close to cert expiry
**          (The test certificates above have not been saved.)
- - - - - - - - - - - - - - - - - - - - - - - - - - - - - - - - - - - - - - - -
ubuntu@ip-xxx-xxx-xxx-xxx:~$ 

ログを確認します。

Server: nginx
Date: Wed, 13 May 2020 12:49:22 GMT
Content-Type: application/pem-certificate-chain
Content-Length: 3567
Connection: keep-alive
Cache-Control: public, max-age=0, no-cache
Link: <https://acme-staging-v02.api.letsencrypt.org/directory>;rel="index"

こんな感じで、 acme-staging-v02 とあるので、大丈夫そうな感じです。

証明書の更新が行われたら、再度確認してみようと思います。